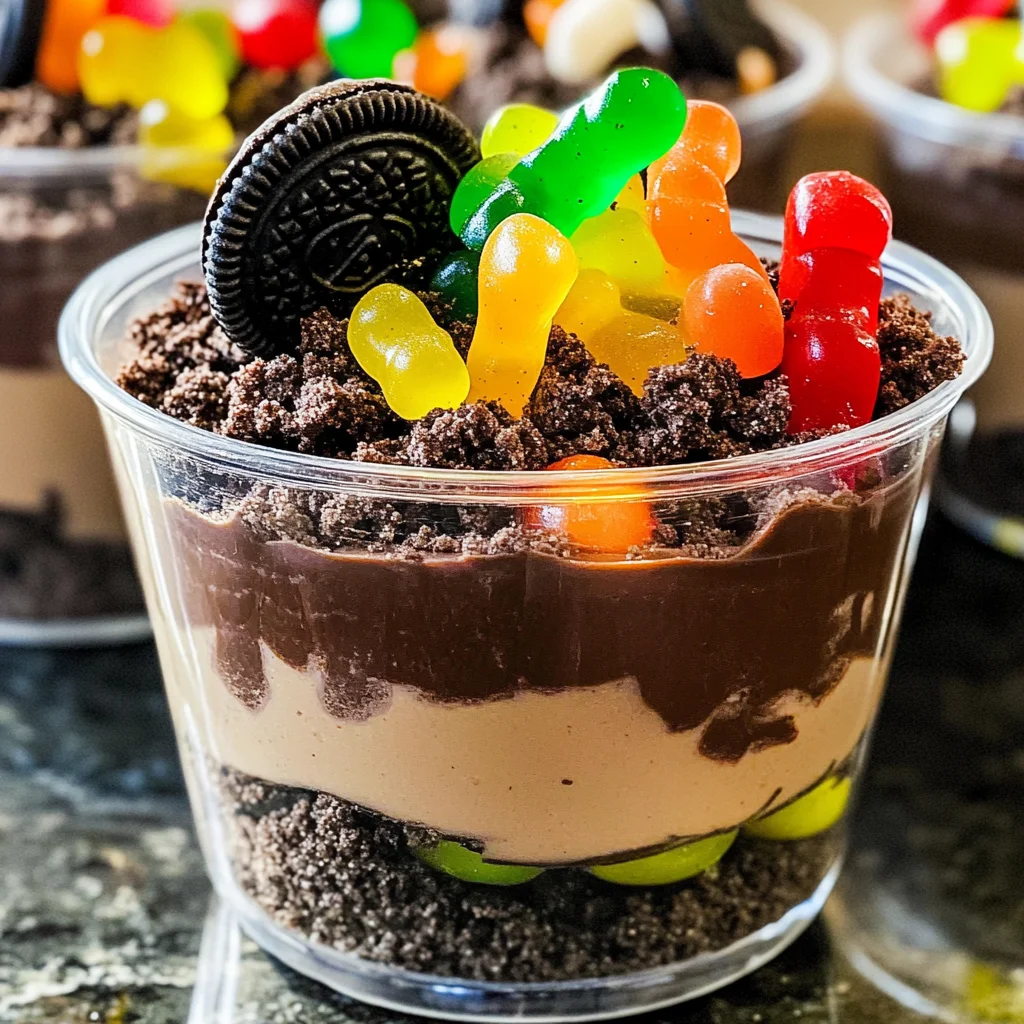
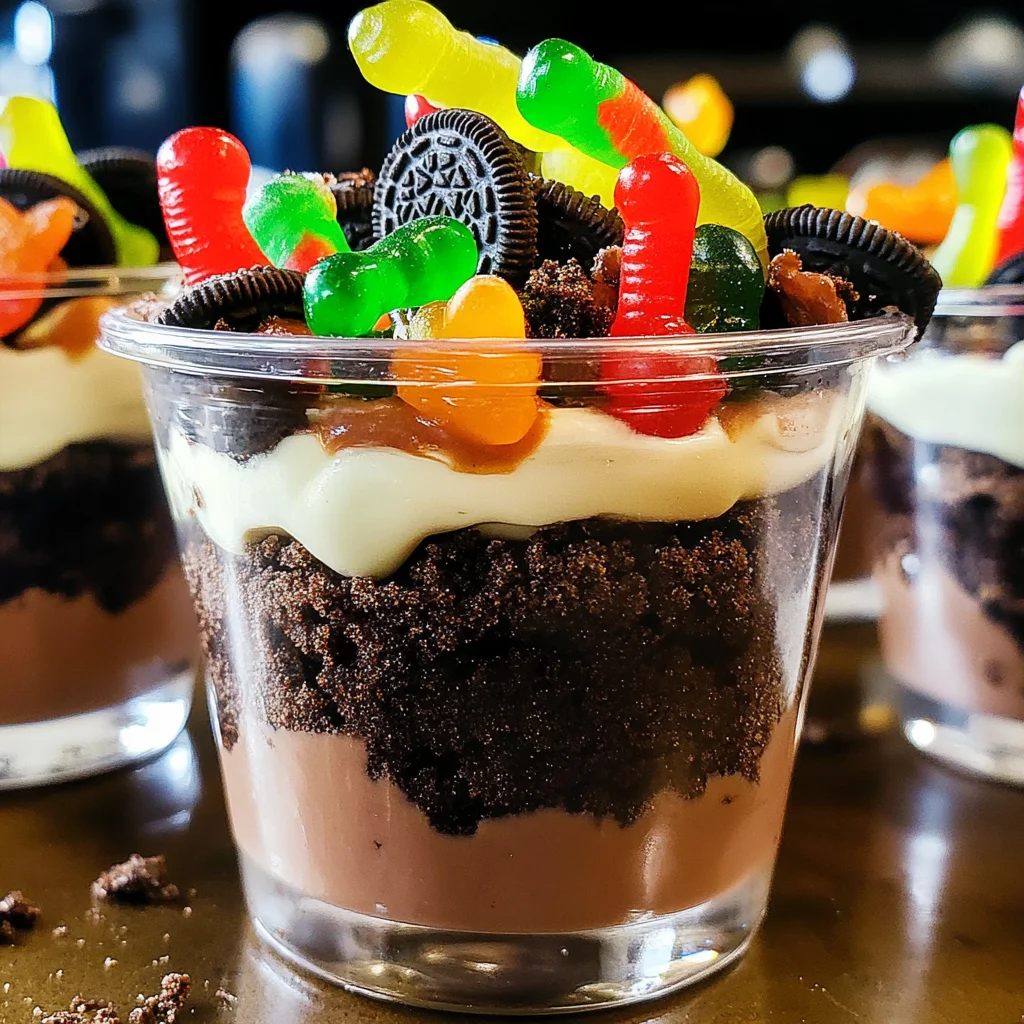
Dirt Cups
Dirt Cups are a fun and delightful dessert that layers rich chocolate pudding, crushed Oreos, and vibrant pectin-based gummy candies. This treat is perfect for parties, family gatherings, or simply to satisfy your sweet tooth. The unique combination of textures and flavors makes Dirt Cups a standout choice for both kids and adults alike.
Why You’ll Love This Recipe
- Quick to Prepare: With just a few simple steps, you can create this delicious treat in about 40 minutes.
- Kid-Friendly Fun: The whimsical look of Dirt Cups makes them a hit at birthday parties or playdates.
- Customizable: Feel free to switch up the gummy candies or toppings to suit different themes or personal preferences.
- No Baking Required: Enjoy the ease of assembling these cups without the need for an oven!
- Perfect Portion Control: Individual servings make it easy to enjoy without overindulging.
Tools and Preparation
To make your Dirt Cups, you’ll need some essential tools to ensure everything goes smoothly. These tools help in mixing, serving, and presenting your dessert beautifully.
Essential Tools and Equipment
- Mixing bowl
- Whisk
- Spoon or spatula
- Glasses or dessert cups
Importance of Each Tool
- Mixing bowl: A good mixing bowl allows you to combine ingredients thoroughly, ensuring a smooth pudding texture.
- Whisk: Using a whisk helps incorporate air into the pudding mix, resulting in a light and fluffy consistency.
- Spoon or spatula: These tools are perfect for folding in whipped topping gently without deflating it.
- Glasses or dessert cups: They provide an appealing way to serve your Dirt Cups while showcasing their layered beauty.
Ingredients
Layers of chocolate pudding, crushed Oreos topped with pectin-based gummy candies!
For the Pudding Layer
- 3.4 ounces box instant chocolate pudding mix
- 2 cups milk
- 8 ounces whipped topping (thawed)
For the Topping
- 10-12 Oreo cookies (crushed)
- 32 pectin-based gummy candies
How to Make Dirt Cups
Step 1: Prepare the Pudding
- In a medium bowl, add cold milk and sprinkle the pudding mix over top.
- Whisk until well combined.
- Let it sit for 5 minutes to thicken.
Step 2: Fold in Whipped Topping
- Gently fold in the whipped topping until everything is well combined.
Step 3: Assemble the Cups
- Spoon the pudding mixture into glasses or dessert cups.
- Sprinkle the crushed Oreo cookies on top of each cup of pudding.
Step 4: Add Gummy Candies
- Place 4 pectin-based gummy candies on top of each cup as a finishing touch.
Step 5: Chill Before Serving
- Chill the assembled Dirt Cups until you are ready to serve them.
With these simple steps, you can enjoy delicious Dirt Cups that are sure to impress!
How to Serve Dirt Cups
Dirt Cups are a fun and creative dessert that can be enjoyed in various ways. Here are some serving suggestions to make your presentation even more delightful.
Individual Glasses
- Serve each Dirt Cup in clear glasses to showcase the beautiful layers of chocolate pudding and crushed Oreos. The transparent sides will highlight the fun textures.
Party Platters
- Create a larger display by arranging multiple cups on a party platter. This is perfect for gatherings or celebrations, allowing guests to help themselves easily.
Themed Decorations
- Consider decorating the cups with themed toppings, such as edible flowers or spooky candy eyes for Halloween. This adds a festive touch and makes your dessert stand out.
Mini Cups
- Use smaller cups for single servings at events. Mini Dirt Cups are great for portion control while still providing a delicious treat for everyone.
Creative Toppings
- Experiment with different toppings like whipped cream, sprinkles, or additional gummy candies on top of the Oreo layer. This adds an extra layer of flavor and visual appeal.
How to Perfect Dirt Cups
Achieving the ideal Dirt Cups involves a few key steps during preparation. Here are some tips to elevate your dessert game.
-
Choose Quality Ingredients: Use high-quality chocolate pudding mix and fresh milk for the best flavor and texture in your Dirt Cups.
-
Crush Oreos Correctly: For uniform texture, crush Oreos finely but not into dust. This way, they provide a nice crunch without overwhelming the pudding layers.
-
Chill Before Serving: Allowing the Dirt Cups to chill before serving enhances their flavors and helps them set properly, ensuring a delightful experience.
-
Layer with Care: When layering pudding and Oreos, use a gentle hand to keep the layers distinct and visually appealing in each cup.
Best Side Dishes for Dirt Cups
Pairing side dishes with your Dirt Cups can create a well-rounded dessert experience. Here are some great options to consider.
-
Fresh Fruit Salad: A light fruit salad balances the richness of Dirt Cups with refreshing flavors.
-
Chocolate-Covered Strawberries: These sweet treats add an elegant touch that complements the chocolate theme of your dessert.
-
Vanilla Ice Cream: A scoop of vanilla ice cream brings creaminess and contrasts nicely with the textures in Dirt Cups.
-
Nutty Granola Bars: Crunchy granola bars provide an additional texture that pairs well with soft pudding.
-
Mini Cheesecakes: Offering mini cheesecakes can add variety while keeping things indulgent for dessert lovers.
-
Brownie Bites: Rich brownie bites give another chocolate option that is sure to please any sweet tooth at your gathering.
-
Caramel Dip with Apple Slices: A sweet dip alongside crisp apple slices gives a refreshing crunch that contrasts beautifully with the creamy Dirt Cups.
-
Peanut Butter Cookies: These cookies offer a nutty flavor that complements the sweetness of the Dirt Cups perfectly.
Common Mistakes to Avoid
When making Dirt Cups, it’s easy to overlook a few key steps. Here are some common mistakes and how to avoid them.
- Boldly skip the chilling step: Failing to chill your Dirt Cups can result in a less enjoyable texture. Always allow them to sit in the fridge before serving.
- Boldly underestimate the pudding thickness: Not letting the pudding mixture thicken properly can lead to runny Dirt Cups. Ensure you wait the full 5 minutes before mixing in the whipped topping.
- Boldly overmix the whipped topping: Mixing too vigorously can deflate your whipped topping, making the layers less fluffy. Gently fold it into the pudding for best results.
- Boldly forget about portion sizes: Filling cups too full may cause spills when adding gummy candies. Aim for about three-quarters full to avoid messiness.
- Boldly ignore ingredient temperature: Using cold milk straight from the fridge helps achieve optimal pudding consistency. Letting it warm up can affect the final product.
Storage & Reheating Instructions
Refrigerator Storage
- Store leftover Dirt Cups in an airtight container.
- They will last up to 3 days in the refrigerator.
Freezing Dirt Cups
- Freezing is not recommended as it can alter the texture of both pudding and whipped topping.
- If you must freeze, use freezer-safe containers and consume within one month.
Reheating Dirt Cups
- Oven: It’s not advised to reheat these as they are best served cold.
- Microwave: Do not microwave; serving cold preserves their texture.
- Stovetop: Reheating is unnecessary; enjoy directly from the fridge.
Frequently Asked Questions
What are Dirt Cups?
Dirt Cups are a fun dessert made with chocolate pudding, crushed Oreos, and gummy candies, resembling a playful garden treat.
Can I customize my Dirt Cups?
Absolutely! You can add different toppings like sprinkles or use various flavors of pudding for a unique twist.
How do I make vegan Dirt Cups?
To make vegan Dirt Cups, substitute dairy milk with plant-based milk and use non-dairy whipped topping.
How long do Dirt Cups last?
Dirt Cups stay fresh for about 3 days when stored in an airtight container in the refrigerator.
Can I use different cookies for Dirt Cups?
Yes! Feel free to experiment with different cookies like chocolate wafers or even homemade cookie crumbles for added flavor.
Final Thoughts
Dirt Cups are not only delicious but also versatile and fun to make. With their layers of creamy chocolate pudding and crunchy Oreos topped with gummy candies, they’re sure to be a hit at any gathering. Customize them with your favorite toppings or flavors for a personal touch!
Dirt Cups

Indulge in the whimsical delight of Dirt Cups, a playful dessert that layers creamy chocolate pudding with crunchy crushed Oreos and vibrant pectin-based gummy candies. This no-bake treat is perfect for parties, family gatherings, or simply satisfying your sweet cravings. With its unique combination of textures and flavors, Dirt Cups are sure to impress both kids and adults alike. Easy to customize and prepare in just about 40 minutes, this fun dessert brings joy to any occasion.
- Prep Time: 15 minutes
- Cook Time: 0 minutes
- Total Time: 15 minutes
- Yield: Serves 4
- Category: Dessert
- Method: No-Bake
- Cuisine: American
Ingredients
- 3.4 ounces instant chocolate pudding mix
- 2 cups milk
- 8 ounces whipped topping (thawed)
- 10–12 Oreo cookies (crushed)
- 32 pectin-based gummy candies
Instructions
- Prepare the pudding by mixing cold milk with pudding mix in a bowl. Whisk until combined and let sit for 5 minutes to thicken.
- Gently fold in the whipped topping until fully incorporated.
- In clear glasses or dessert cups, layer the pudding mixture followed by a sprinkle of crushed Oreos.
- Top each cup with four pectin-based gummy candies for a colorful finish.
- Chill the assembled Dirt Cups in the refrigerator until ready to serve.
Nutrition
- Serving Size: 1 Dirt Cup (250g)
- Calories: 320
- Sugar: 28g
- Sodium: 210mg
- Fat: 16g
- Saturated Fat: 8g
- Unsaturated Fat: 6g
- Trans Fat: 0g
- Carbohydrates: 43g
- Fiber: 2g
- Protein: 4g
- Cholesterol: 5mg